How to Read a Map

Learn the Basics of Map Reading 

How to read a map is a crucial skill when heading out into the mountains. The map is a key piece of equipment when heading out into the mountains. Therefore knowing how to read a map is pretty key!

The map is essential when heading out into the mountains. It provides a representation of the terrain you are planning to walk on, in a two-dimensional form. Maps offer you a clearer and more convenient navigation method, unlike photographs. They are also a great source of information to help guide you in the mountains.

Before you go:

Before setting off on your chosen route, it is best practice to look carefully at the map. Doing so will make map reading a lot easier.  The route can then be checked so that any potential hazards can be identified. If needed they can be avoided or a better quicker/safer route can be followed. In addition to this, maps are the best guide during your journey. Firstly they can help you follow your planned route. And secondly let you walk and plan days that don’t involve you covering more height than is needed!

Map Reading:

It is critical to familiarize yourself with the features and functionality of a map with a map features tool. This can be found on the side of the map itself or on the internet. Understanding map scale i.e. markings and symbols on maps and how they correspond to real terrain is crucial when you are navigating in the hills. If you master using maps, you can increase your confidence and become proficient in using maps in the natural environment. This will enable you to study a map beforehand and have n imaginary picture of what you will encounter before heading into the hills.

Map Scales

The proportion between the ground distance and map distance is called a scale. It is typically represented as a proportion of 1:50,000 or 1:25,000.

The scale of 1:50,000 is typically used in the Ordnance Survey Landranger maps which means 1cm on the map corresponds to 50,000cm or 500 meters on the ground. Similarly, 2cm on the map corresponds to 1km on the ground.

The below diagram of 1:50,000 shows a comparison between the 1:50,000 scaled map and the 1:25,000 scaled map. The larger the scale of the map, the more detailed information it will show i.e. contours, small rock formations, streams, and water features including lochans and small streams. However, you must note that a larger scale map covers a smaller area and it can create difficulty if you want to cover a broader area. In this scenario, a smaller-scale map may be the best choice even if it represents lesser details. Learning how to read a map can be daunting and confusing at first but with time – Most of the time enjoyable (frustrating when not lost – geographically misplaced!) can be a great skill to practice as well as the more you do the more you want to do to hone your skills and get better.

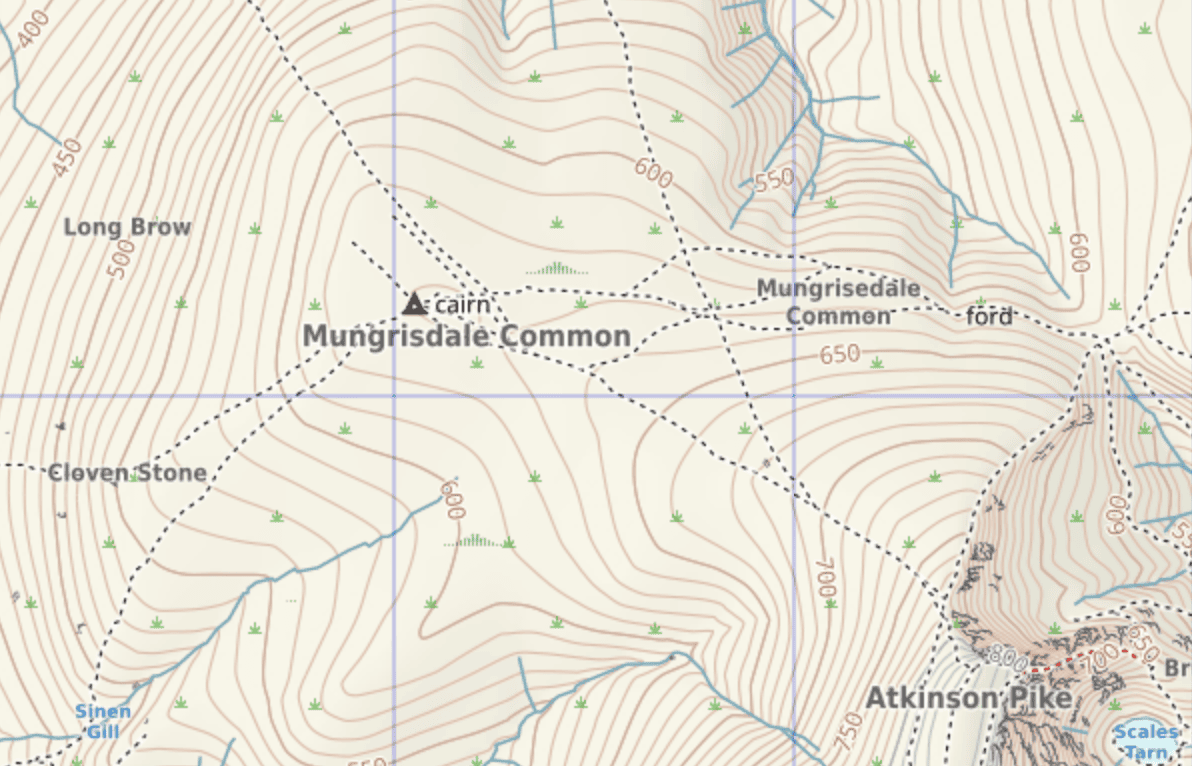
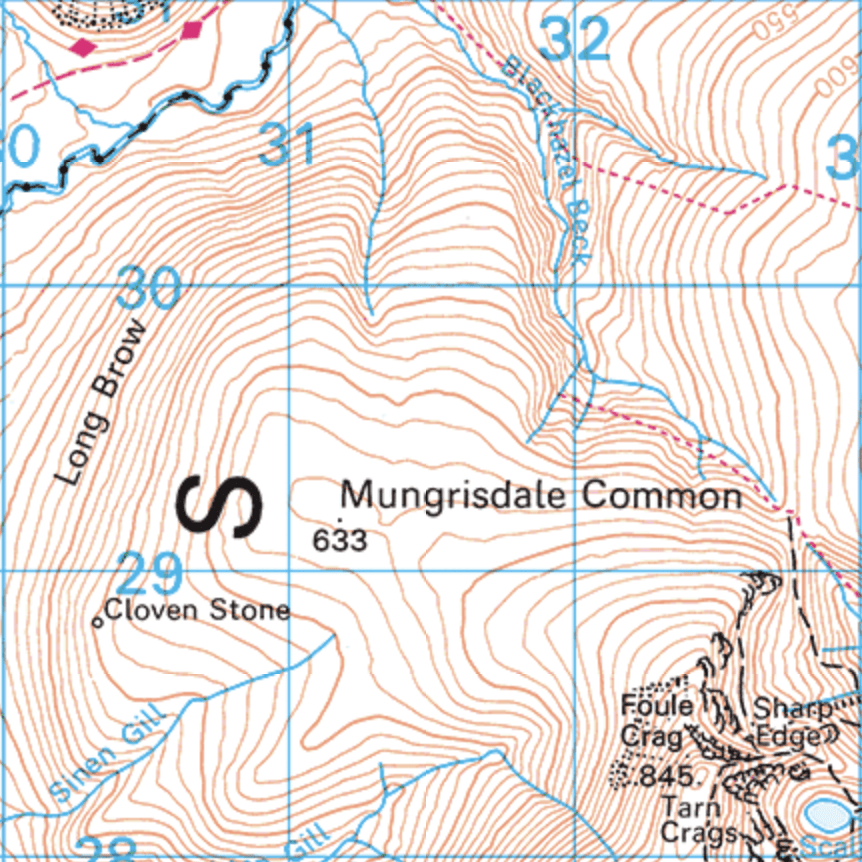
Below map showing a section of a 1:50,000 map of Mungrisdale Common:
How-to-read-a-map – map-reading
How-to-read-a-map map-reading

The 1:50,000 and 1:25,000 scale maps are more popular in the Lake District, Scotland, and Wales, and are most common for walkers’ maps. There are other scales also available like Harvey’s map which has a scale of 1:40,000. These are often used by runners and orienteering events where a compromise between the 1:25 and 1:50 scales is reached.
Links:

Why not check out our how to take a bearing page: Here

Navigation Courses: Here

Map Reading Basics: Here


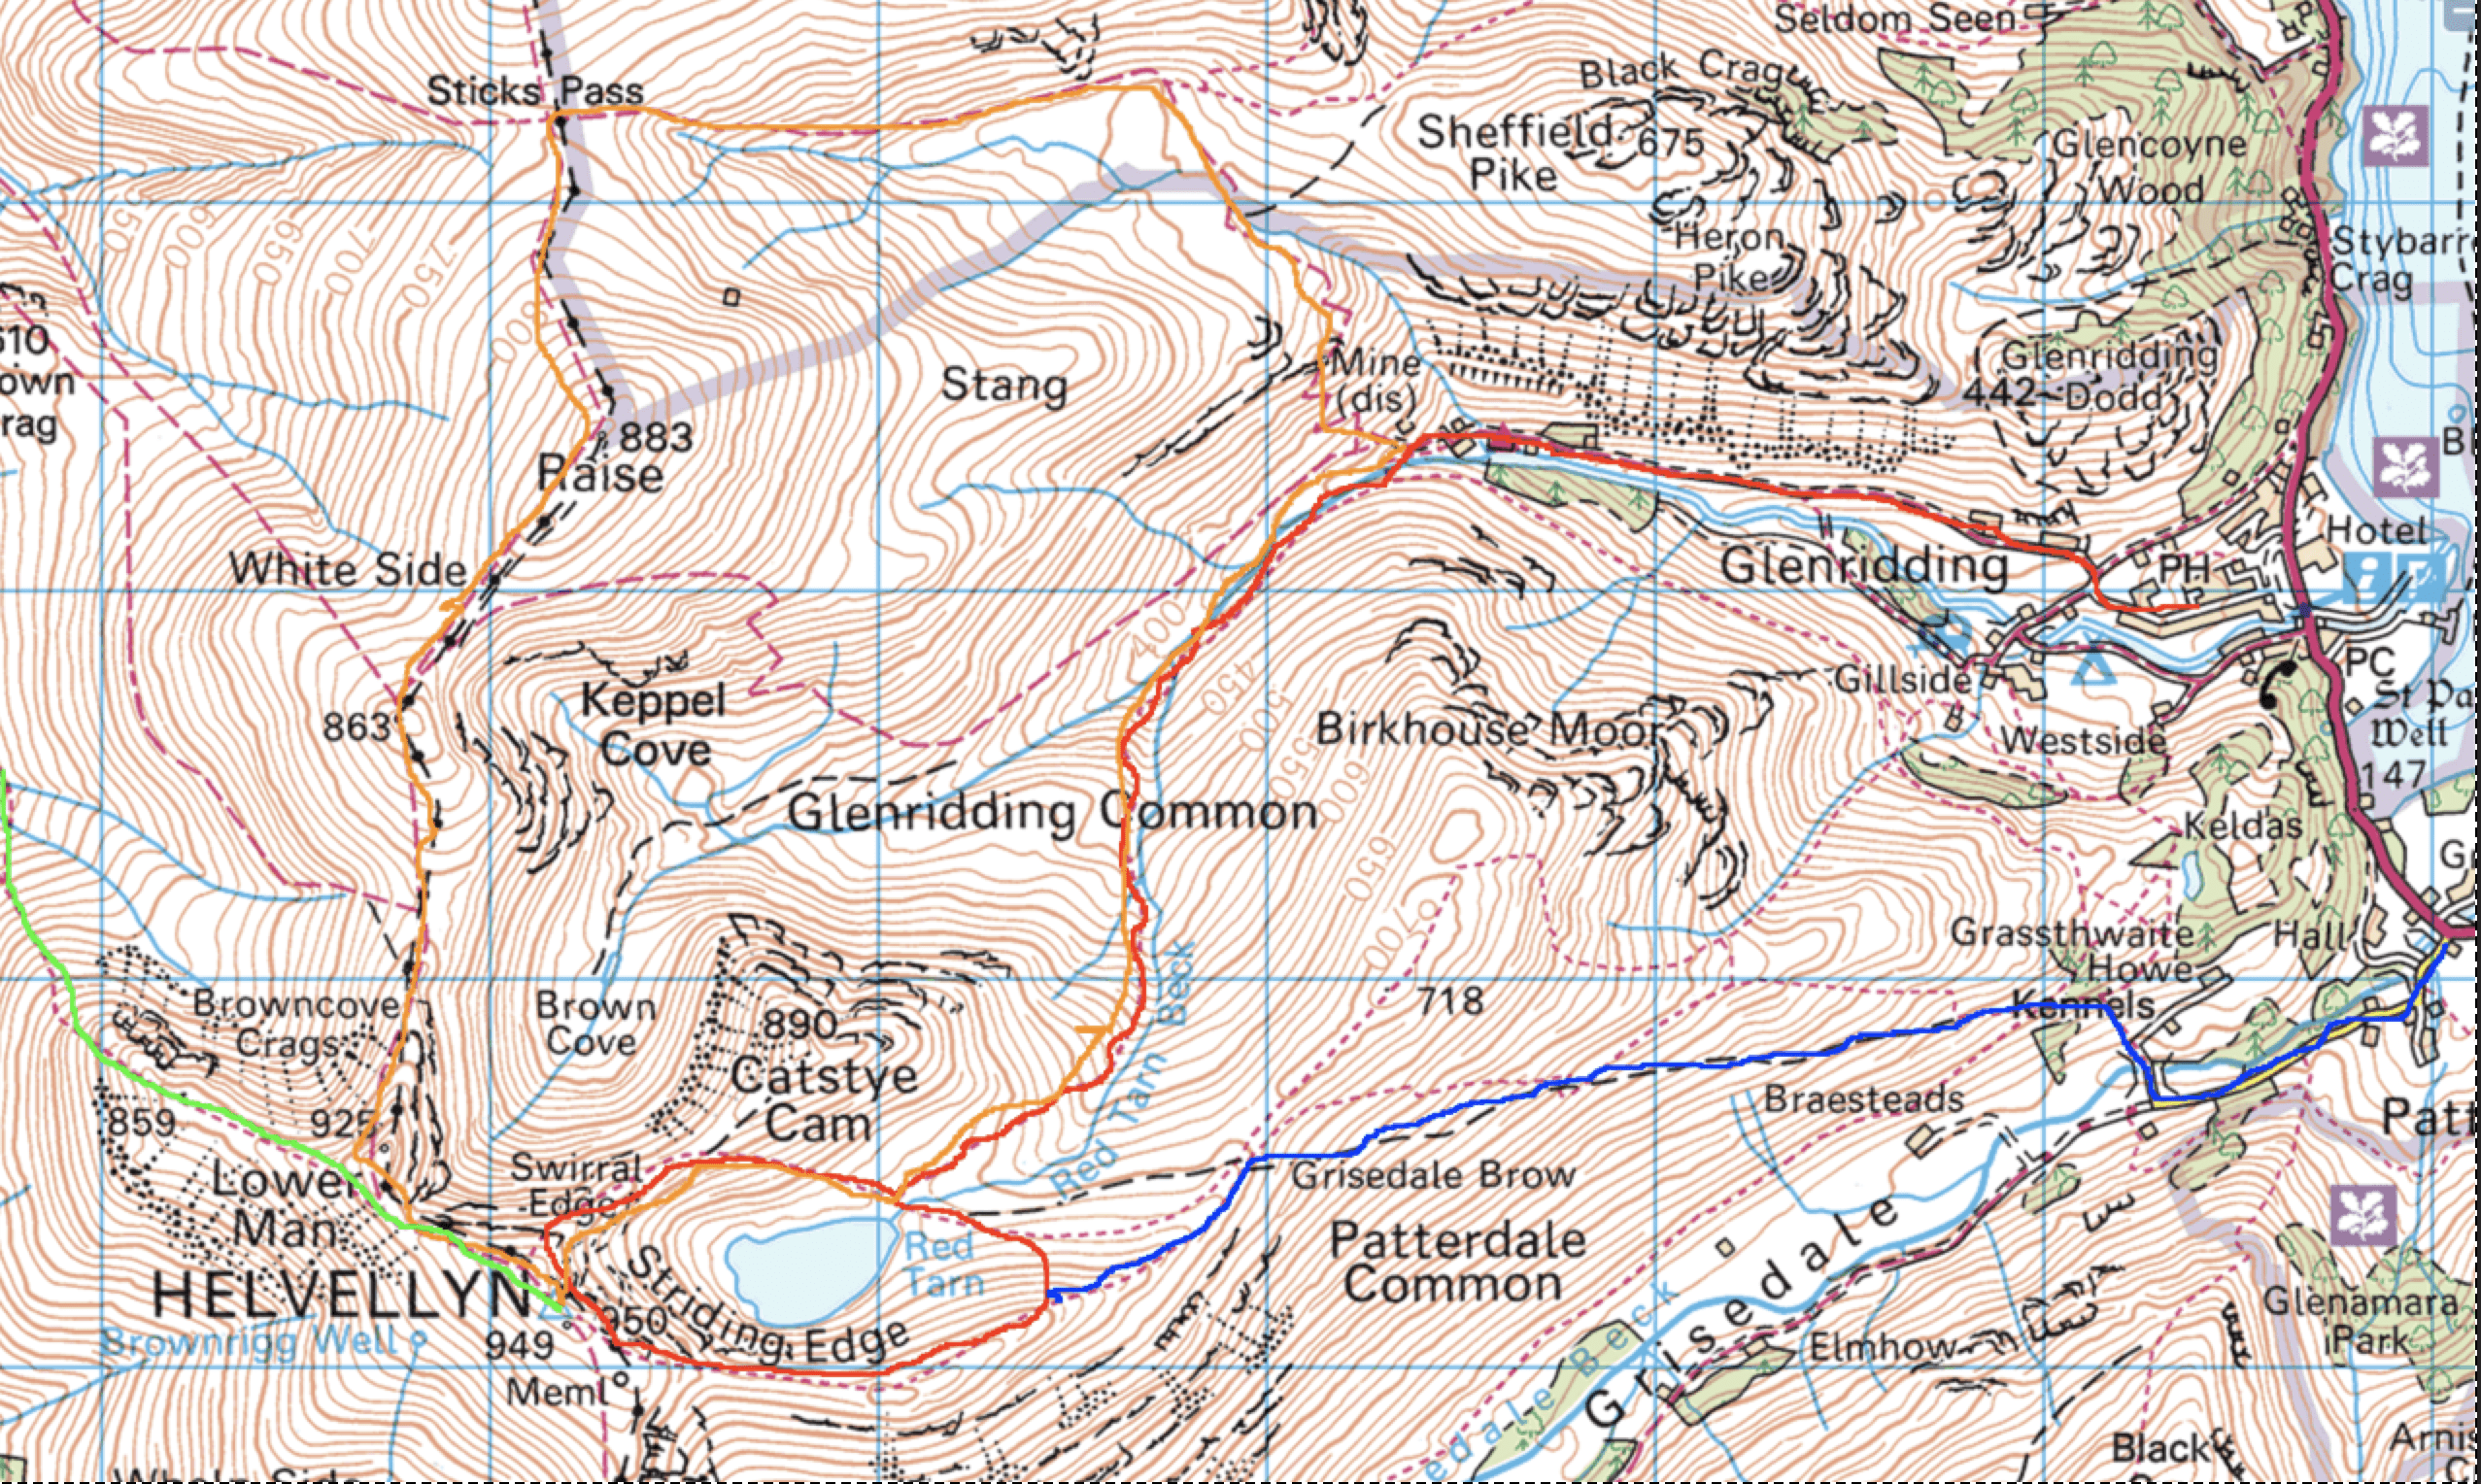
picture of ordnance survey map helvellyn - striding edge - swirral edge - walking routes

Grid References

Maps feature a network consisting of horizontal and vertical lines at 1km intervals that help determine the precise location and the relationship to the rest of the country. The vertical lines on the map are called “eastings’ ‘ whereas the horizontal ones are known as “northings”. These lines are numbered from 00 to 99 in 100km blocks and each block is identified by a number in the key. Article -How to read a map – map reading

Grid reference:

At times we need to use the grid lines to pinpoint a location, you need to read the numbers on the eastings first. Followed by the northings. For E.g. Mungrisdale Common Summit is situated in square 3129 in the example map provided. This 4-digit grid reference corresponds to a 1km square area on the ground. If you want to get a six-figure grid reference that identifies the square of 100m by 100m. Therefore the number of tenths within the square in which the location lies should be calculated from both. For example. to the east and to the north of the bottom-left corner.

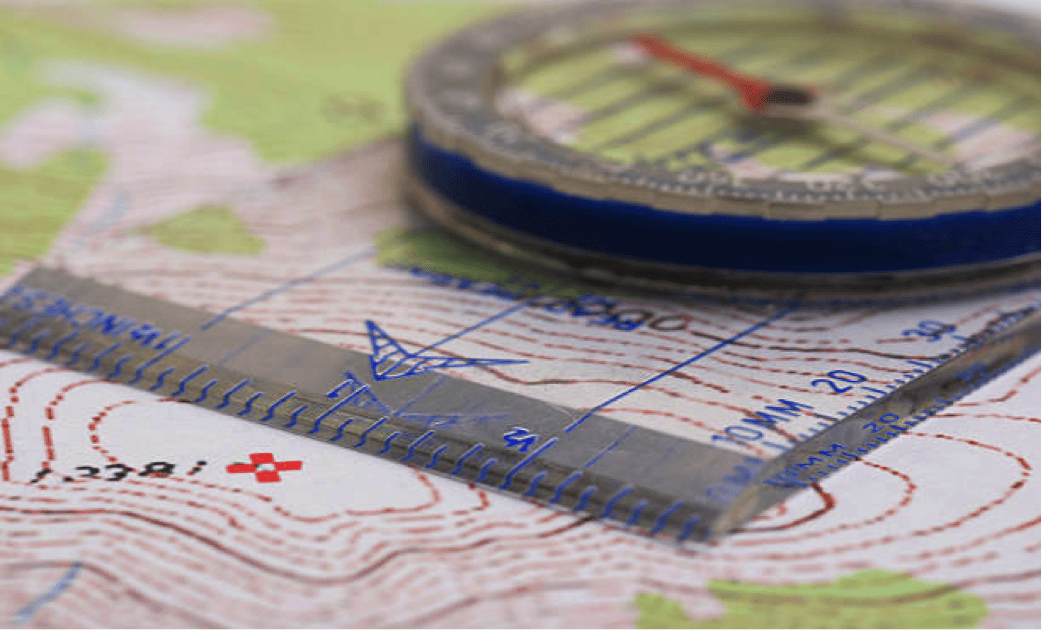
Therefore it is preferred to use the Romer scale on the side of the compass to do this by eye. In the example, the Mungrisdale Common summit is found to be located at 2-tenths along and 2-tenths up, resulting in a 6-figure grid reference of 312292. This gives the precise location of the mountain within 100 meters. Article -How to read a map – map reading

Contours

The contour line is the most useful feature on the map for navigation in the mountains. These lines are brown and clearly show the shape and steepness of the land, eventually, you can visualize the terrain in 3 dimensions. Contours can be identified in the ground even if the area is covered with snow hence they are highly reliable. A contour line intersects points of equal elevation with the contour interval representing the height difference between lines.

Intervals:

The intervals vary in different proportion maps by map scales i.e. with 10 meters on 1:50,000 OS maps, 5 or 10 meters on 1:25,000 OS maps, and 15 meters on Harvey’s 1:40,000 Maps. Article – How to read a map – map reading

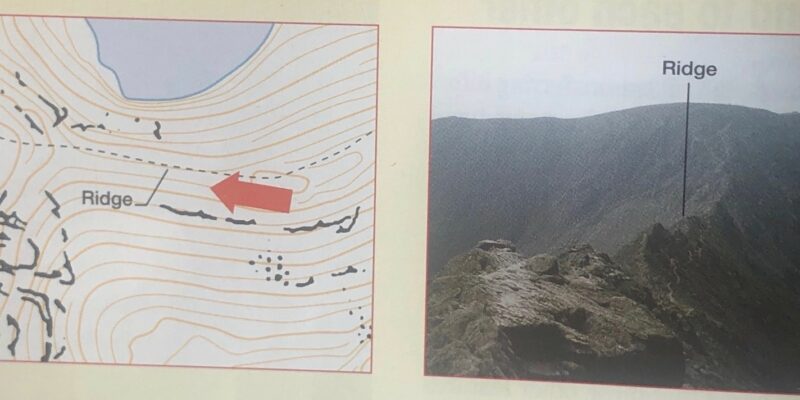
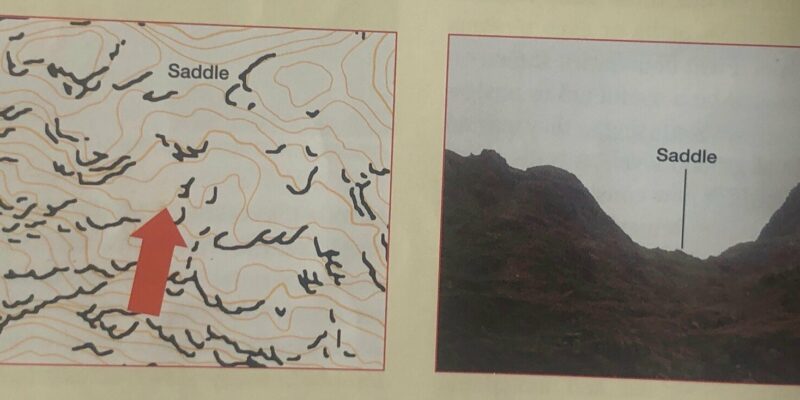
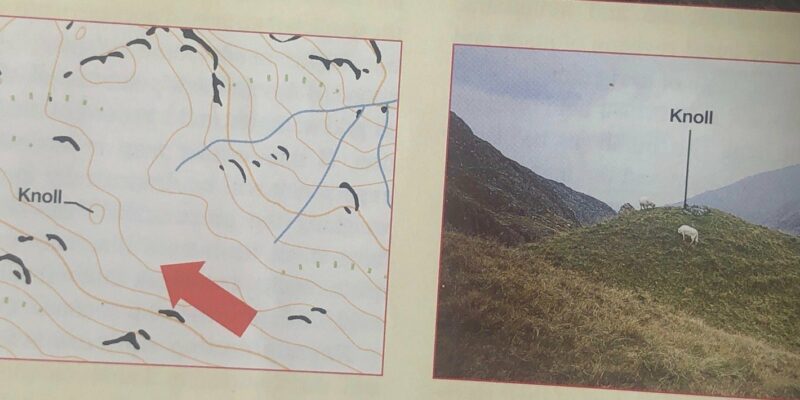
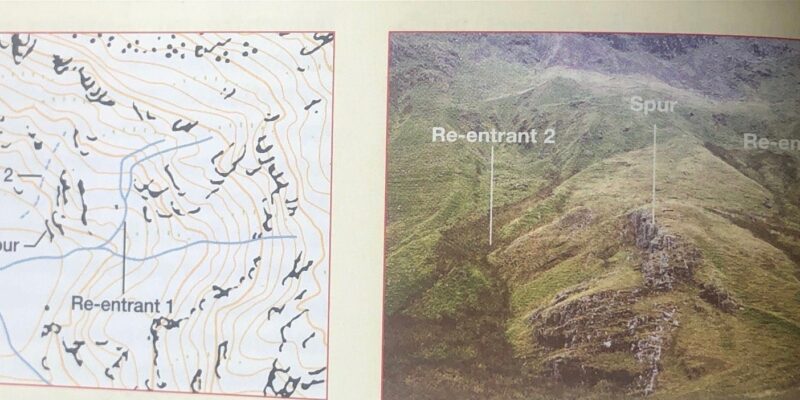
Contour lines also represent the shape of the ground and this is known as the Contour features. Some common features are shown below in the pictures. These are Ridges, Saddles, Knolls, and the all-important Re Entrants;

To interpret contour features on the map, there are three main methods. Firstly, evaluate the ground under your feet and identify what type of feature it forms on the map. The second is, to look at the feature beyond your immediate location under good visibility and identify them on a map. Third, examine the contour features on the map in poor visibility and form an imagination about how the ground ahead will look in good visibility.

If you want to determine whether contours are going uphill or downhill, just have a look at heights incorporated within contour lines. The contour height figures are printed on the map facing uphill so if they are up from the right side then you are looking uphill on the map. If they are upside down then you are looking at the downhill map. Rivers and streams flow downhill and it makes it easier to indicate high and low ground on the map. In addition, you can find any nearby hill on the map to determine whether a slope is going up or down.

I am text block. Click edit button to change this text. Lorem ipsum dolor sit amet, consectetur adipiscing elit. Ut elit tellus, luctus nec ullamcorper mattis, pulvinar dapibus leo.

How to Take a Bearing

How To Take A Bearing With Accuracy & Confidence | Essential Adventure Guide

Are you looking to learn how to take a bearing in a compass? If so, you’re in the right place. Taking a bearing with a traditional map and compass is an incredibly useful and practical skill that anyone can learn.

Whether you’re looking for directions when traveling or trying to get your bearings while on an adventure, learning to read and follow your compass will ensure you stay aware of the journey! In this guideline, we’ll review what taking a bearing entails and provide tips for getting accurate readings from your compass.

Bearing Usage Guide In A Compass For Beginners

If you’re new to using a compass, taking a bearing may seem daunting, but with our step-by-step guide, you can quickly and easily learn how to read your compass and navigate confidently.


What is a bearing, and how is it used in navigating with a compass? A bearing is a direction from one point to another, measured in degrees relative to either true or magnetic north. It is useful when navigating accurately over long distances, even with no visible landmarks. To navigate using a compass, you need to know how to take a bearing and how to read it on a map.


Here is our guide for mastering this skill:

❖     Familiarize Yourself With Your Compass

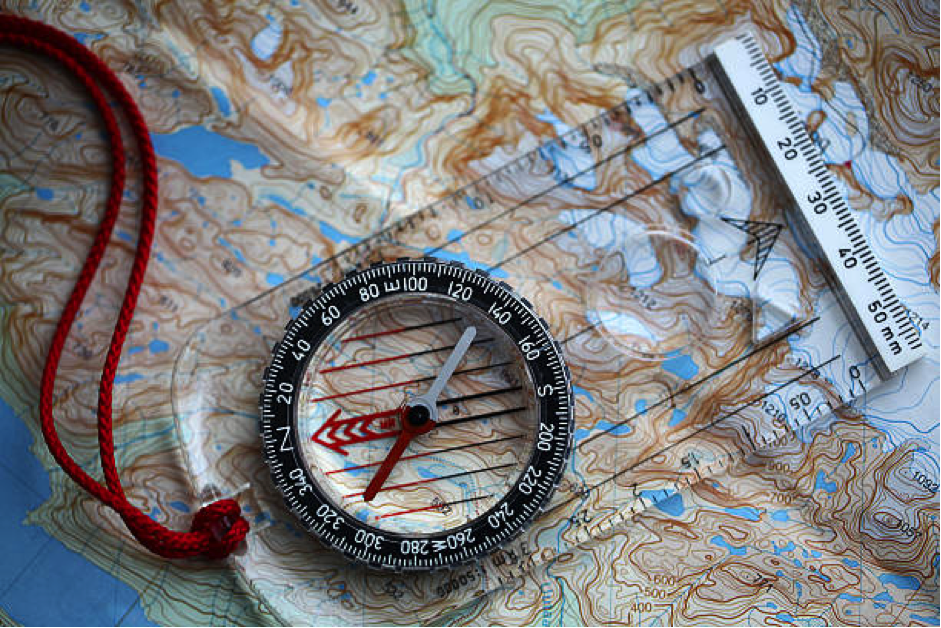
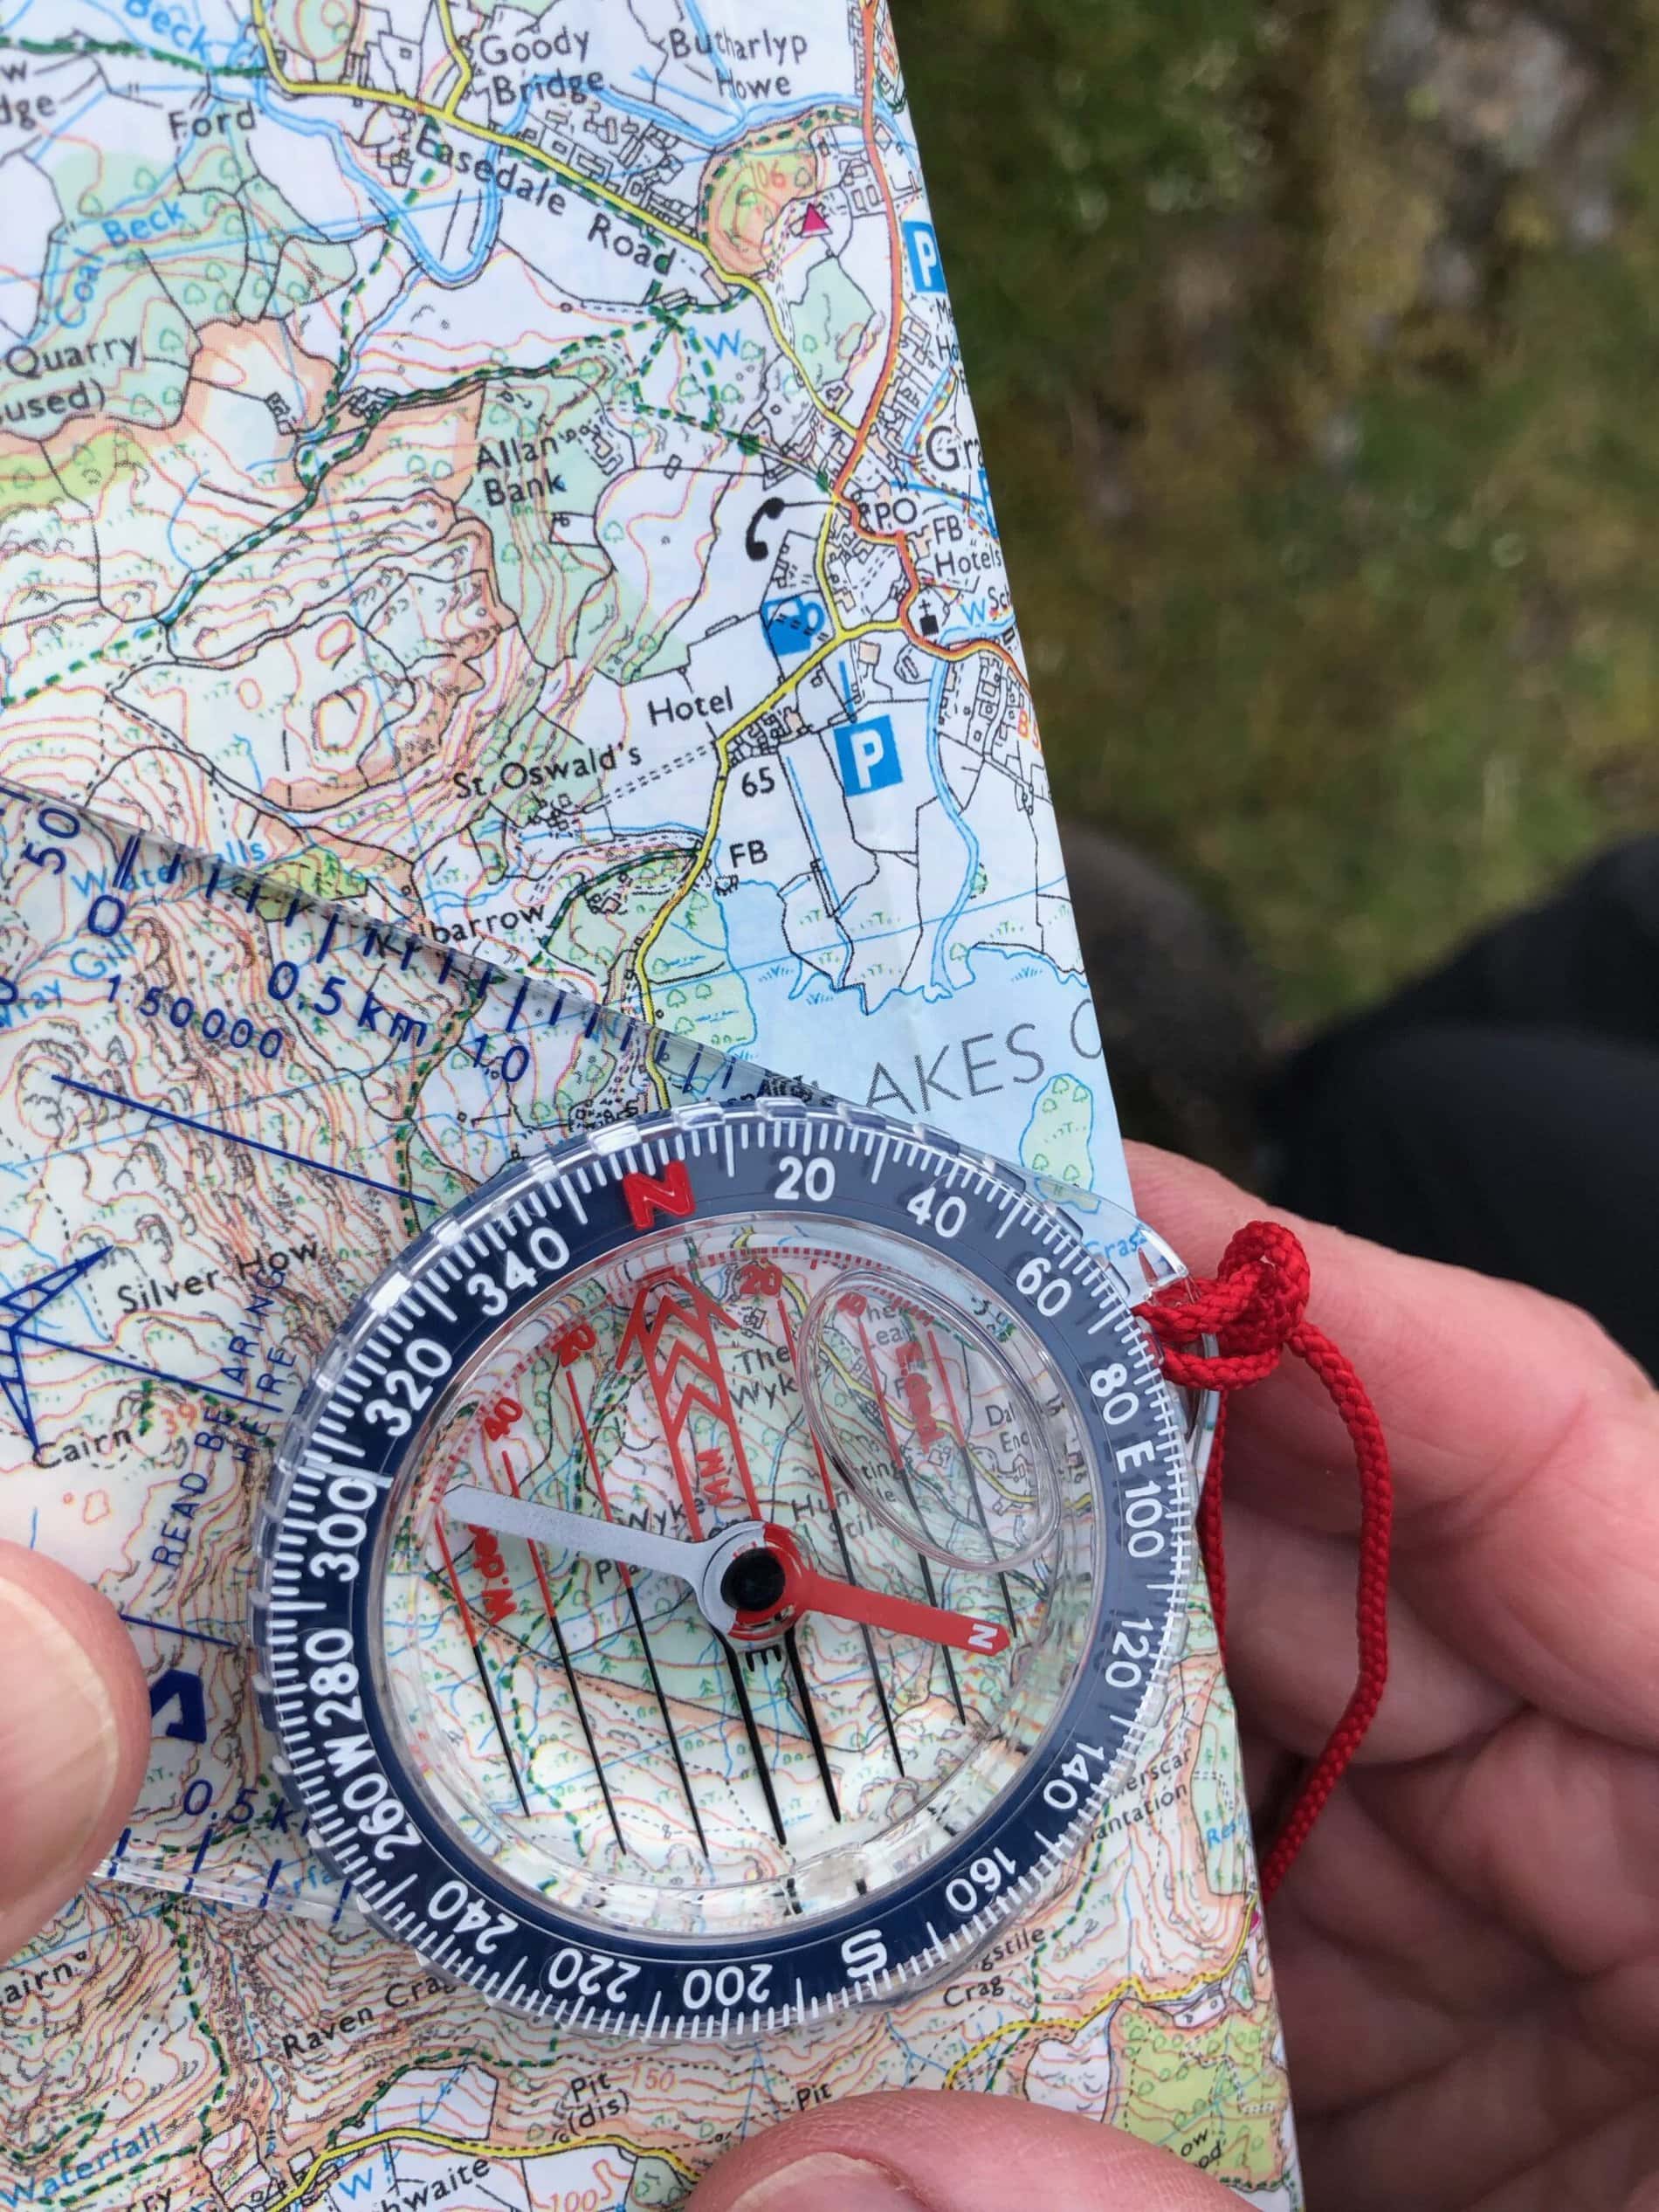
Start by getting to know how to use a compass. Understand its parts, how to adjust it depending on your location, and how to hold it steady to get an accurate reading. For a basic compass, the direction of the travel arrow and the sighting line are crucial features to take your bearing.

❖     Map Reading

To use a compass properly, you’ll also need to learn how to read a map. Start by determining where you are on the map and your travel direction. Also, choose the magnetic declination in your area. The declination can vary depending on your location and influences the compass readings.

❖     Taking A Bearing

Once you understand how to use a map and compass, it’s time to take your first bearing. Align your compass needle with the north-south grid lines on the map, hold your compass level, and turn the compass housing until the orienting arrow points to true north. Then, rotate the entire compass until the direction of the travel arrow points straight to your destination. Look at the compass reading to see what degrees you’re traveling to.

❖     Follow Your Bearing

Now that you’ve taken a bearing, turn the map so that the north-south grid lines are facing towards north. Readjust the compass housing relative to the direction of the travel arrow, and then hold the compass level as you follow your bearing. Keep your eyes on your compass as you move to avoid deviating from your route.

Bonus Tips For Novices: How To Use A Compass Like A Pro

Learning to take a bearing with a basic compass is essential for anyone who loves exploring the great outdoors. Nonetheless, even the most experienced outdoor enthusiasts can find using a compass for the first time daunting. If you’re new to using a compass, don’t worry – we’ve got you covered!

Here are some bonus tips to help you use a compass like a pro:

●     Choosing The Right Compass

Your initial task is to select the appropriate compass. Several compasses are available, but a basic hand-held magnetic compass is the easiest for beginners. Look for a compass that is easy to read and has clear markings. It’s also important to ensure your compass works well before using it.

●     Understanding Magnetic Deviation

Magnetic deviation is the difference between magnetic north and true north. It can affect the accuracy of your compass reading. It would help if you compensated for magnetic deviation to ensure the accuracy of your compass. You can add or subtract the magnetic deviation from your compass reading.

●     Reading The Map And Compass

To take a bearing, you need to be able to read both the map and compass. Firstly, orient your map so that the top of the map matches the direction you are facing. Secondly, hold your compass level with the map and look at the compass rose. Finally, rotate the compass housing until the north arrow aligns with the direction of the north on the map.

●     Taking And Following A Bearing

To take a bearing, align the compass housing with the landmark you want to travel towards and then read the bearing at the index line. From here, you can follow the bearing by traveling in the direction the compass points while checking and adjusting your course as you walk.

●     Practicing In Different Environments

Finally, make sure to practice using your compass in different environments. It will help you become familiar with the equipment. It will also prepare you for potential outdoor situations where you must rely on your compass to navigate effectively.

Navigation-course Lake-District-navigation Learn-to-navigate

The image above shows a bubble in the compass housing. This is caused by time due to knocks and bangs and general wear and tear of your compass. Because compasses are susceptible to damage, we would recommend a use of a case. Case here: Alternatively you can make a homemade version using a toilet roll and some gaffer tape! Simples. If the bubble like in the picture gets larger than 5mm then it’s time for a new one. You should get 15/20 years if not more if you properly look after your compass.

Which Compass:

For basic navigation then something like this is fine: Here This will get you going for sure. But as you progress then this one Here will definitely be the right choice. As it has all the functions you need, and all the ones you don’t! The Expedition 4 has long been the industry standard for outdoor professionals.

STEP 1 : Positioning The Compass: Aligning The Points

Properly positioning and aligning your compass is crucial for accurate navigation. Choose a flat surface and orient your map to correspond with the compass’s north-south axis. Place the compass on the map with its north-south axis parallel to the map edges, and align the needle with the orienting arrow.

Hold the compass level and read the bearing from the direction of the travel arrow. Avoid metallic objects and estimate midpoints if needed. With these steps, you’ll be ready to take your bearings like a pro!

Step 2: Orienting The Compass: Aligning To Grid North

Before using a compass to take a bearing, it is critical to ensure that the compass is appropriately oriented to the north. By aligning the compass with the grid north, users can ensure that their readings are accurate and not affected by the compass’s orientation. To orient the compass, lay it on a flat surface and move it until the compass needle lines up with the orienting arrow on the face of the compass. Continue to adjust the compass until the arrow points toward the north. Once the needle and arrow are aligned, the compass is correctly oriented.

Step 3: Magnetic Variation Adjustment: Adapting To Local Magnetic Fields

The earth’s magnetic field can vary based on geographical location, impacting compass readings—It is known as magnetic variation, which is the difference between true north and magnetic north. To account for magnetic variation when using a compass, you can check a map to determine the magnetic variation at your location. Adjust your compass accordingly by rotating the bezel until the declination arrow points toward the magnetic variation value found on the map. Once the adjustment is made, following the compass readings will lead you in the right direction.

Step 4: Aligning Yourself With the Compass

It is essential to align yourself with the compass correctly. To get an accurate bearing reading from your compass. Stand in place and hold the compass level, then turn your body until the compass needle points to the north.

Maintain your current position and turn the compass housing until the orienting arrow is aligned with the magnetic needle. Based on the compass readings, it aligns your body with the direction you want to follow. You are now ready to take your bearings and navigate towards your destination.

Conclusion

Taking a bearing with a traditional magnetic compass is an incredibly useful and practical skill anyone can easily learn. With the tips provided in this guide, you should now feel more confident reading your compass and be able to take a bearing accurately.

Remember that practice makes you perfect, and if, at first, you don’t succeed – keep trying! It might be beneficial to contemplate acquiring a compass of superior quality to assist with precision when obtaining bearings.

Taking bearings and using compasses is not difficult, but becoming proficient requires time and practice. So get out there, take some bearings, find your way around the world, and have an adventure! Maybe you’ll discover something new along the way!

Links:

Why not check out our how to read a map page: Here

Navigation Courses: Here:

Blencathra – Sharp edge

Blencathra – 868m


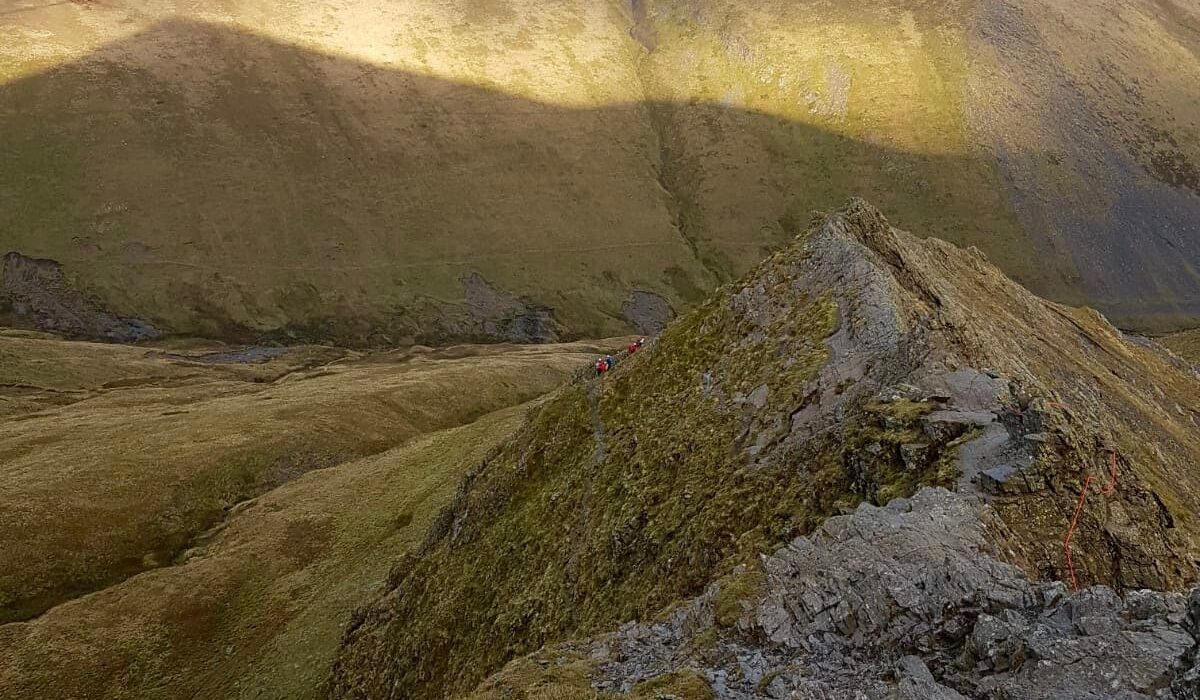
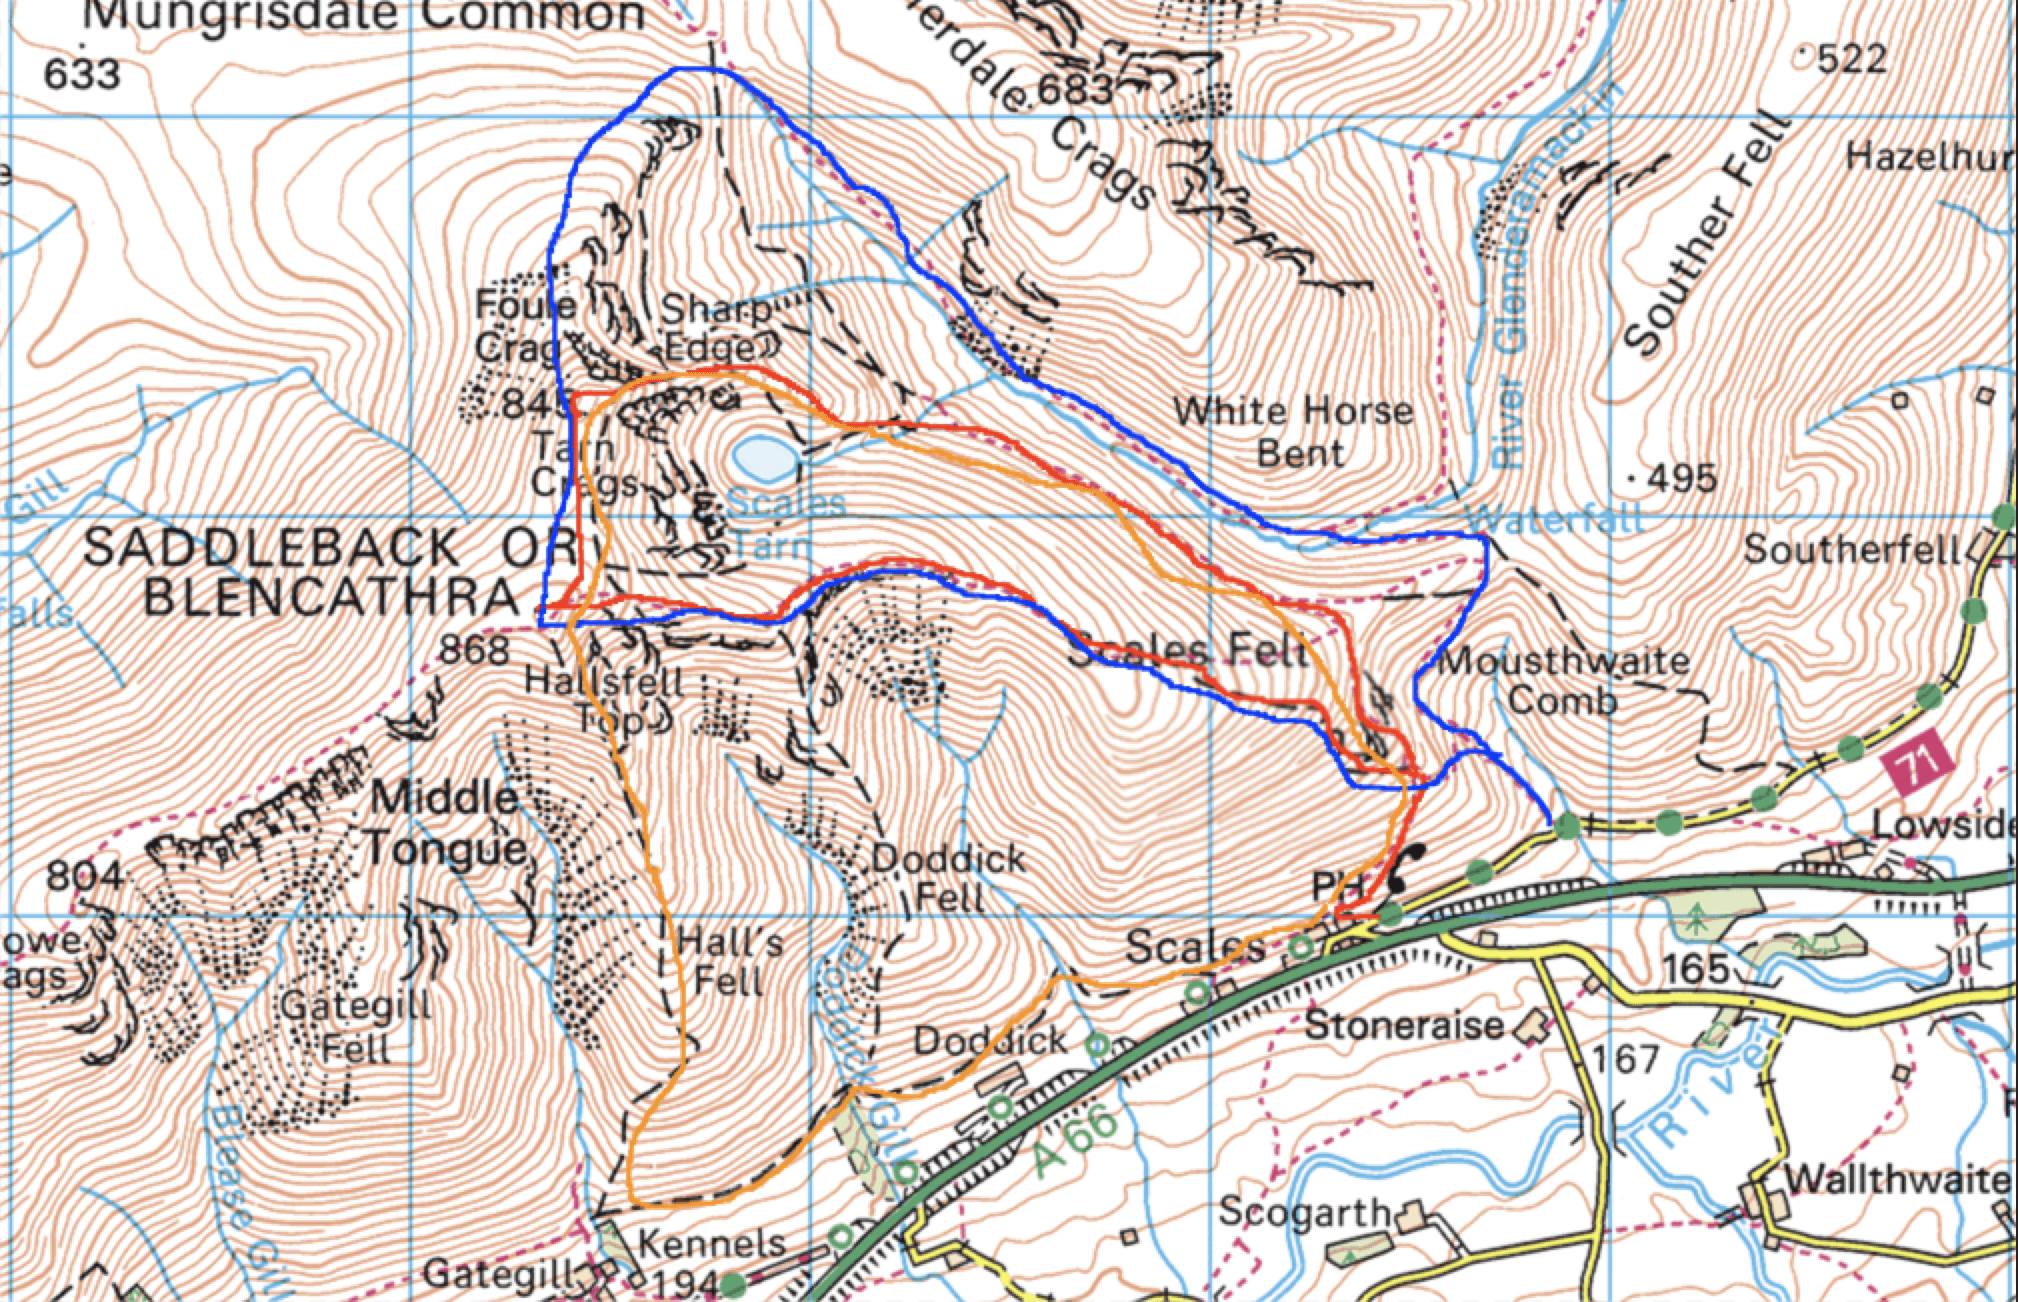
Come and walk Blencathra  – One of the Lake Districts most iconic mountains, and a must on a Keswick walkers tick list. Blencathra can be walked with or without climbing Sharp Edge. In fact it can just be walked using one of the marked routes shown (see picture) But it’s certainly more fun getting to the top by Sharp edge. Firstly the edge is not classed as ‘climbing’ but come in to the ‘scrambling’ classification and are graded as level 1. Check out are Scrambling grade description here.

It’s in the name…

Blencathra or Saddleback as it was first known, due to the shape of the mountain looking from the east.

Like all mountains Blencathra commands respect, and with any mountain weather conditions can change when hiking this mountain.  We will provide you with a recommended kit list. On request, we will send this out at the time of you’re booking.

Due to the walks length, Ideally you should be hovering around, or at our Bronze fitness level. This means you’ll get the most out of your time up Blencathra and Sharp Edge.

Of course that said, we have guided people of all ages and abilities up this mountain, over our 2 decades of guiding in the hills of UK and Europe. Your day with us will be one that is fun and run by our highly experienced and qualified instructors.

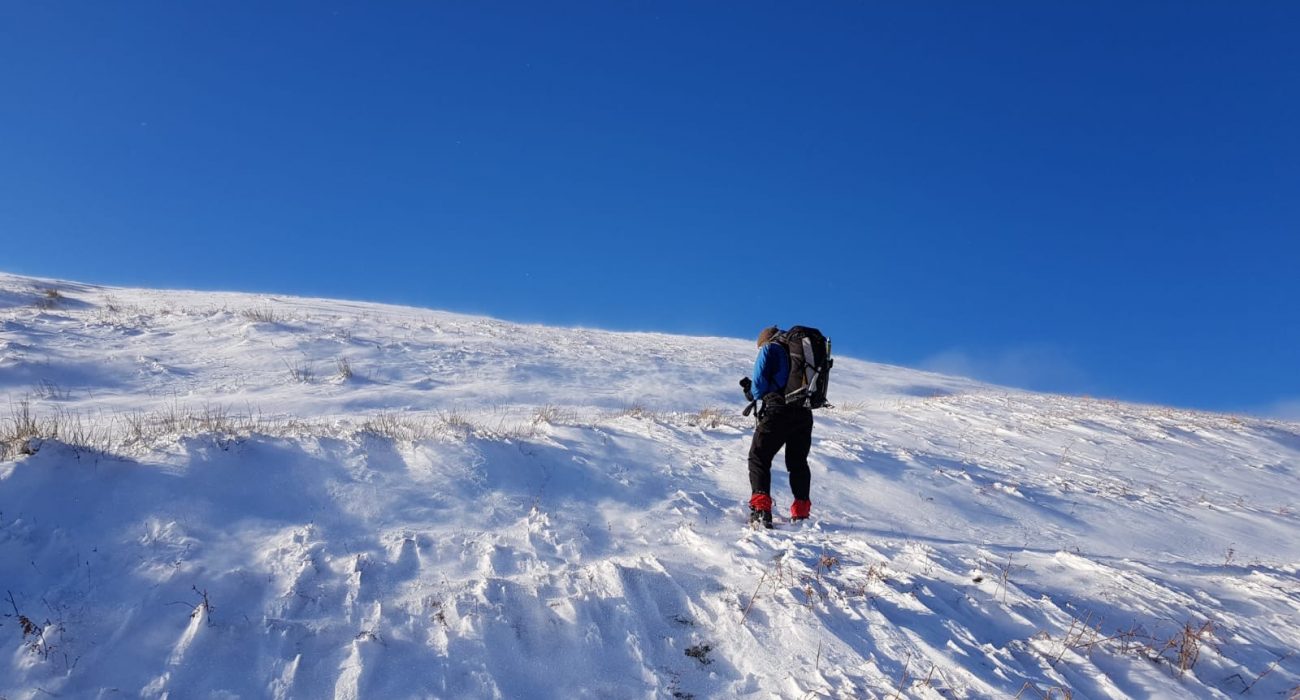
Blencathra via Sharp Edge is generally walked in the spring/summer months of the Lake District. Likewise it can be tackled in the winter months too. This is a different undertaking, as the days are shorter and colder. Snow also makes the journey far harder than the spring/summer months. In winter extra clothing is needed. Again full kit list will be sent out on booking confirmation.

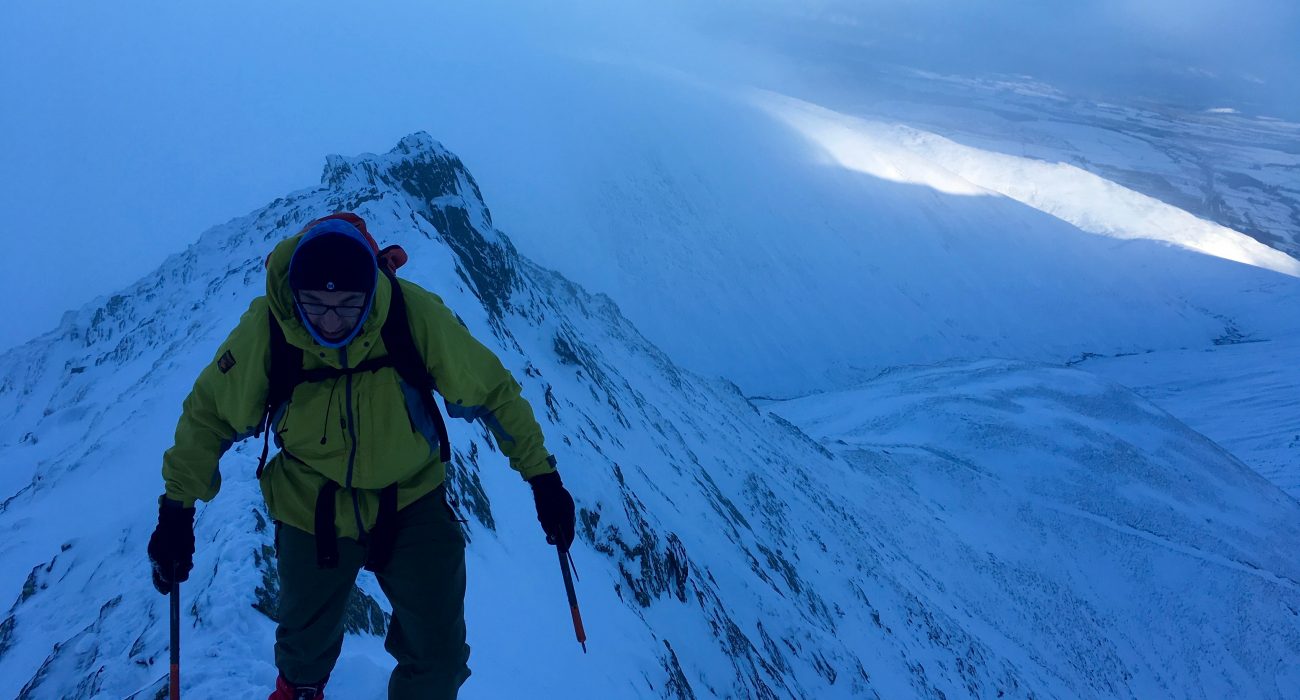
If you are considering a winter ascent of Blencathra / Saddleback, then we recommend a training day with us in preperation. In truth you will need to use crampons and ice axe to gain the summit. The ground via Striding and Swirral edges becomes a lot trickier in winter and you will need to have a confident approach to walking this mountain.

Routes:

To explain the routes up Blencathra, please see our attached map. Here you will see 3 route variations. Starting with the red route, this is the classic way up Sharp Edge from Scales.  This route takes in Scales tarn, Sharp edge and Blencathra / Saddleback summit. Afterwards we make our way back down Scales fell. An easy fell that’ll let you admire the ridge you’ve just climbed – Sharp edge.

The blue route misses out Sharp edge, and makes it’s way to the Col between Mungrisdale common and Bannerdale crags. Incidentally the latter has a fine scramble on it’s eastern flanks, and also makes a great edition to the day. As a result this is considerably longer in time. Likewise we would finish down Scales fell.

The orange route makes a fine day, and one that is recommended in the classic Keswick walks guide. Again making our way up Sharp edge, and onto the summit. But instead of Scales, we head down Hallsfell ridge which is, if you stick to it a lovely easy scramble. Subsequently makes for a lovely finish to an iconic mountain.

In conclusion there are many ways to ascend this beautiful mountain. Get in touch if there is an alternative you prefer.

Walking map routes of Blencathra
Pricing:

For a group of 4 persons the price is £50 per person.

A £50 deposit is required to book a place. See our Contact and Pricing page for more details.

For larger groups please get in touch for pricing.

*  We operate a 1:4 instructor policy on Sharp Edge. For larger groups, or if you are just walking Blencathra, then get in touch.